📣 Firmware Update Release:
Firmware Version v0.22 is now released! Please follow the link here or update via Cloudloop Device Manager.
Firmware Update Process
This page describes the process for updating the RR-Mini's Application Firmware, Bootloader Firmware, Iridium Transceiver Firmware, and BLE module Firmware, either locally or via over-the-air updates.
In order to avoid issues while updating firmware or supporting files please observe the following: -
- While the update file transfer is taking place;
- Turn off position reporting.
- Turn off the NMEA stream.
- Avoid sending MO's.
- Avoid making configuration changes either by file update or using the BLE app.
- File naming. The files are case-sensitive and will have to match the naming exactly.
- If updating from a version PRIOR to FWv
0.17it is advised to use one of the local methods such as TFTP or serial. - Ensure that both user.cfg and user.fac are updated as required. The .fac file provides a reset to factory default path.
If a factory reset takes place, this file will replace the user.cfg file within the product. - If you are upgrading to FWv
0.15and above, update the Application firmware first, followed by the Bootloader firmware and then you will need to follow the local firmware update process to be able to use our new RockCONNECT IoT App. Follow the local firmware update process to update the Bluetooth Firmware, making sure that the file is named "BLE-App.new" - file can be downloaded from the table above. - Product shipped after 7th April 2025 will have Iridium firmware version
1.5.5or higher. These products must not have the RockREMOTE Mini firmware downgraded lower than FWv0.12. - The User Configuration will be retained following an update - although it is recommended to check the new user.cfg for any feature additions.
- Firmware FWv
0.10and earlier will not gain an Iridium connection with Iridium firmware versions higher than1.3.4.
Firmware Release Notes
v0.22 June 2026
Download latest Firmware bundle here
Individual Firmware files can be found in the table below
New Features - RockREMOTE Mini
- SMTP Improvements - SMTP server is now compatible with more clients. Added a new "smtpMessageTimeout" configuration option to allow a delayed success message to be sent back to the host only once the attachment has left the modem.
- Added Ethernet UP/DOWN status and traffic data to the status page.
New Features - APNT in RockBLOCK Pro and RockFLEET Assured
- Compact position report now includes spoofing and jamming detection values from the onboard UBLOX M10 module.
Bug Fixes - RockBLOCK Pro and RockFLEET Assured
- Fixed issue with the Bootloader overwriting files with the same name uploaded via MSD without clearing the contents first.
- Position reporting was incorrectly switching GNSS and APNT data during spoofing/jamming scenarios.
Known Bugs
- None in this release.
See Previous Release note here
Firmware Table
The process to update the Iridium 9770 modem firmware locally is similar to the updating the product firmware.
If this update is required further instructions will be provided by the Ground Control team.
File Naming
The files are case-sensitive and will have to match the following naming exactly
- RockREMOTE Mini Firmware =
H7-App.new - RockREMOTE Mini Bootloader =
H7-Boot.new - User Configuration =
user.cfg - BLE Firmware =
BLE-App.new - Iridium Firmware =
IRID-App.new
It is recommended to use a JSON editor when changing the user.cfg file as invalid JSON will revert to the default User Configuration file with no error
Local Firmware update via Ethernet (LAN)
An Ethernet connection is required directly to the product for a TFTP update.
Local update via the LAN - Windows
Local Update - Windows
Firmware updates are distributed in files with .new suffix and can be updated as follows.
- Set your PC's static IP to a value in the same range as the RockREMOTE Mini or skip to Step 2 if using DHCP.
- This can be done from the command line with:
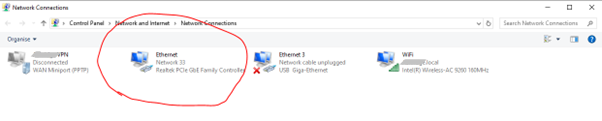
netsh interface ipv4 set address name="Ethernet" static 192.168.250.10 255.255.255.0 192.168.250.1- Or by going to Control Panel -> Network and Internet -> Network and Sharing Centre -> Change adapter settings -> Your adapter -> Properties -> ~IPv4
- This can be done from the command line with:
Ethernet is used as an example here. You will need to replace this with the adaptor number you are using.
If you monitor the network connections when you plug in the RockREMOTE Mini's ethernet you will see the name appear.
- Go to: Control Panel –> Programs –> Turn Windows features on or off and Scroll down to TFTP and select it.
- You can then use the TFTP client to copy new image over Ethernet. NOTE: -i option for octet transfer
When updating firmware the supplied 'user.cfg' file should also be loaded - see instructions and downloads below.
In addition, the command tftp -i 192.168.250.1 put "<path\filename>" user.fac will create a user factory file which is used when factory reset is performed.
The downloaded firmware file must be renamed 'H7-App.new' (case-sensitive)
- Windows command line
tftp -i 192.168.250.1 put "<path\filename.new" H7-App.new
e.g:tftp -i 192.168.250.1 PUT "C:\Users\Major Tom\Documents\H7-App-v0.3.new" H7-App.new - LED blinks between BLUE-GREEN and LIGHT BLUE during the TFTP transfer
- When TFTP reports completion with correct size against our published value the file transfer is complete.
- Power cycle the unit. Restart after update takes about 30s The LED is red whilst the FLASH is erasing and flashes RED/GREEN for about half a second whilst the new image is programmed.
- Then continues with normal start - GREEN until modem starts, then LIGHT BLUE.
User config Update - Windows
- User config load is
tftp -i 192.168.250.1 put "<path\filename>" user.cfg - To get the current config out use
tftp -i 192.168.250.1 get user.cfg "<path\filename>"
For example:tftp -i 192.168.250.1 get user.cfg "C:\Users\Major Tom\Documents\user.cfg" - LED blinks between BLUE-GREEN and LIGHT BLUE during the TFTP transfer
- Reboot the unit
Local update via the LAN - Linux
Local Update - Linux/IoS
- Install a TFTP client:
sudo apt install tftp(Not required for IoS as tftp is natively installed) - Static the IP of the network interface the RR-Mini is connected to, eg if connected to "eth0" use
sudo ifconfig eth0 192.168.250.10 - Launch the TFTP client by running the command
tftp. Hit the enter key twice to initialise the prompt. - Once TFTP is running it will issue the prompt "tftp>" type the following commands, one by one to complete the transfer:
connect 192.168.250.1(makes the connection with the host)binary(Sets mode to binary)
The downloaded firmware file must be renamed 'H7-App.new' (case-sensitive)
put <path>H7-App-X-Y-Z.new H7-App.new(Initiates file transfer)- After transfer power cycle the unit. Restart after update takes about 30s The LED is red whilst the FLASH is erasing and flashes RED/GREEN for about half a second whilst the new image is programmed.
User config Update - Linux/IoS
- User config load is
put <path><new-config> user.cfg(Initiates file transfer) - Reboot the unit for the change to take effect - To get the current config out use
get user.cfg <uploaded-file-name>(Initiates file transfer)
Example user.cfg
Refer to the User Configuration Page.
If the firmware or config update fails for any reason:
- Disconnect the power from the device, wait 1 minute and reconnect the power.
- The Mini will restart using the original firmware/config version, you can then attempt to update the firmware/config again following the process above.
Local Firmware update via the Serial Port
A Serial connection is required for the Kermit update.
- In order to minimise the risk of corruption during firmware updates or downgrades ALWAYS use a baud rate of 57600 or less.
- The downloaded firmware file must be renamed
H7-App.new(case-sensitive) - In order to avoid potential issues it is IMPORTANT that the BOOTLOADER, user.fac and FIRMWARE are updated in that order.
While the update file transfer is taking place;
- Turn off position reporting.
- Turn off the NMEA stream.
- Avoid sending MO's.
- Avoid making configuration changes either by file update or using the BLE app.
Serial port update using Windows
Windows
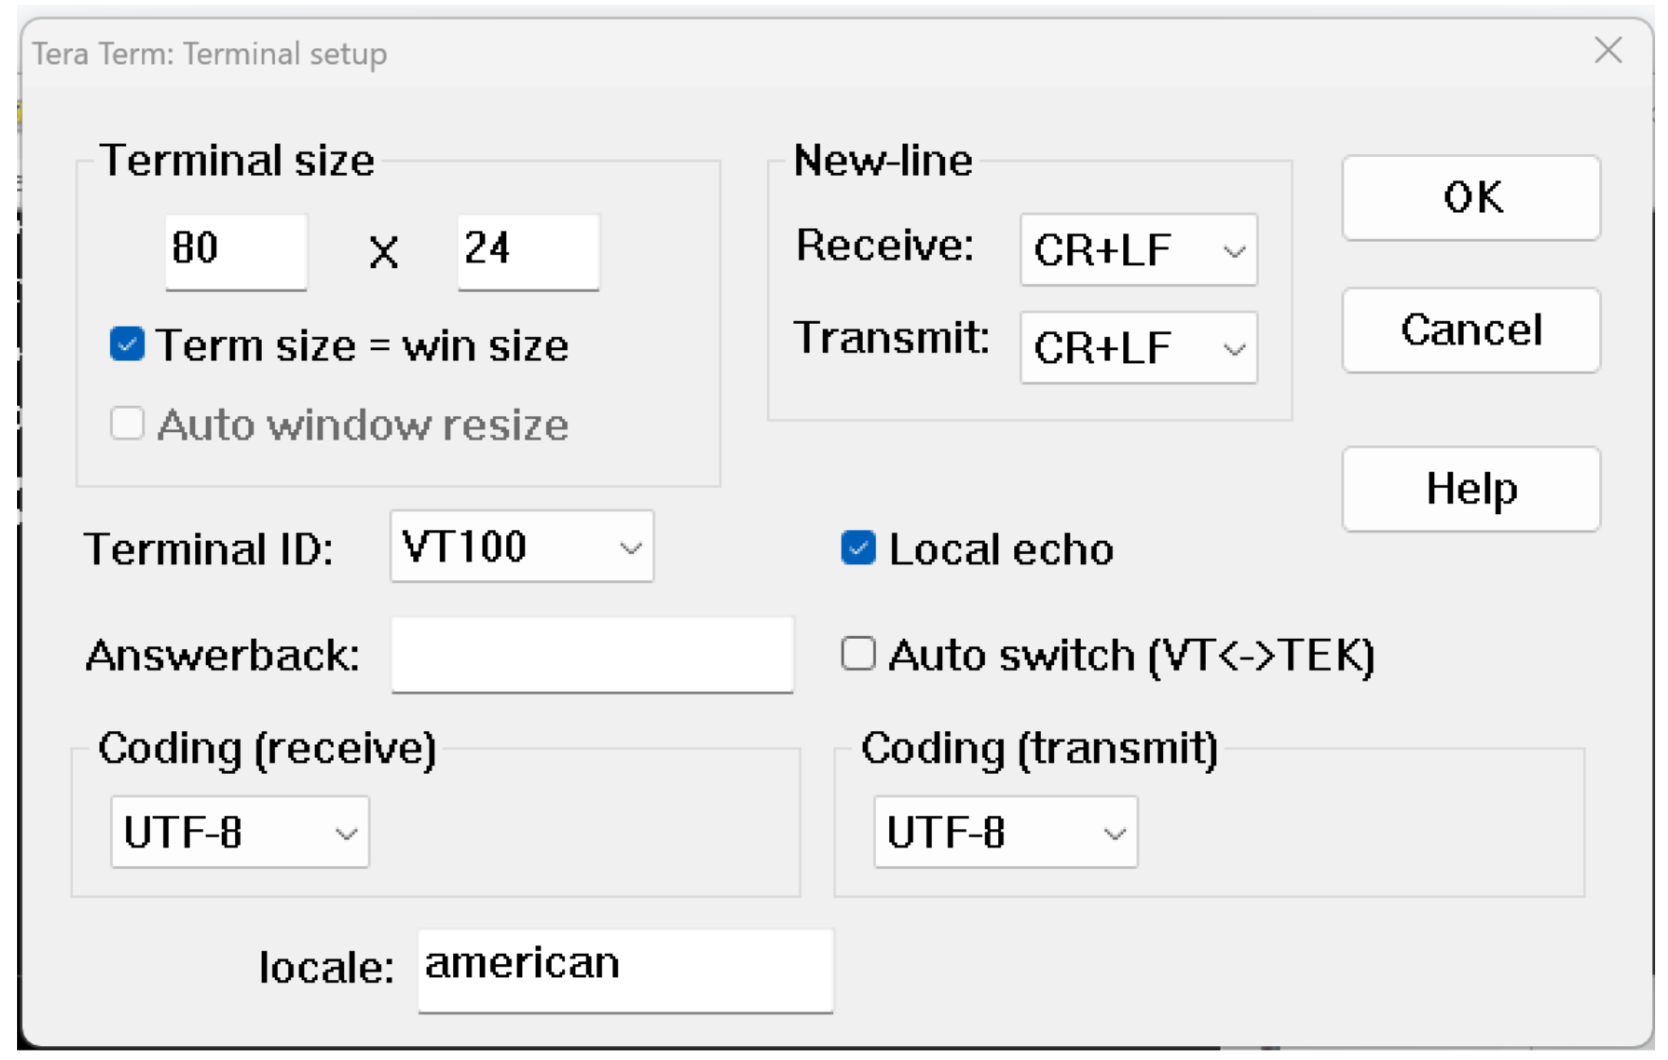
Requires connection to a terminal application that supports Kermit file transfer. Example below uses Teraterm for Windows
-
Serial port settings are
115200,n,8,1 -
Terminal settings are:
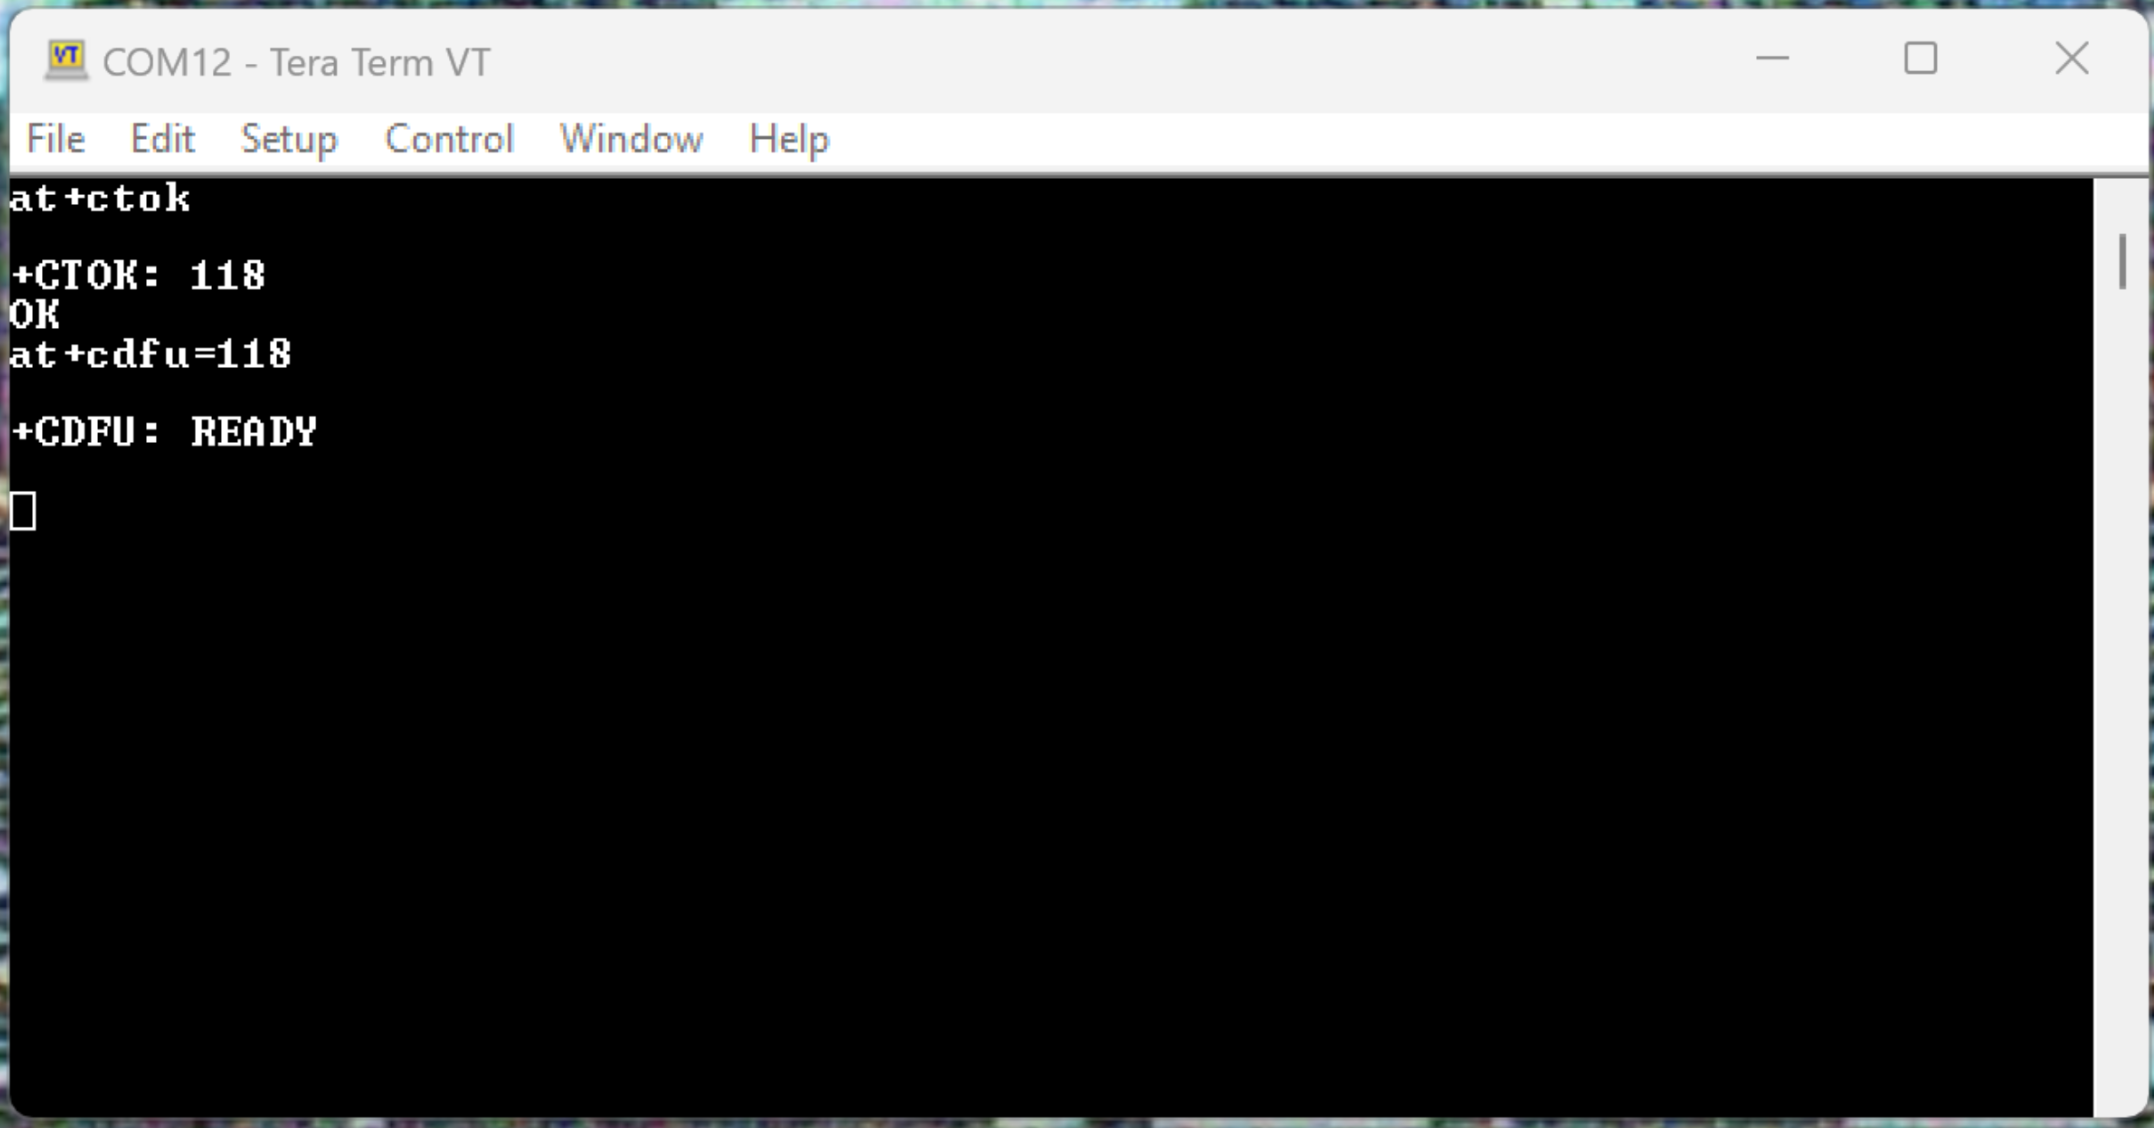
- Put the RockREMOTE Mini or RockBLOCK Pro in "Kermit Receive" Mode:
Command:
AT+CTOK
Expected response:
+CTOK: <token number>
OK
Note that the token number will only be valid for 30s
Command:
AT+CDFU=<insert token number>
Expected Response:
+CDFU: READY
- Click File > Transfer > Kermit > Send ... Select the firmware file in the dialog.
The downloaded firmware file must be renamed 'H7-App.new' (case-sensitive)
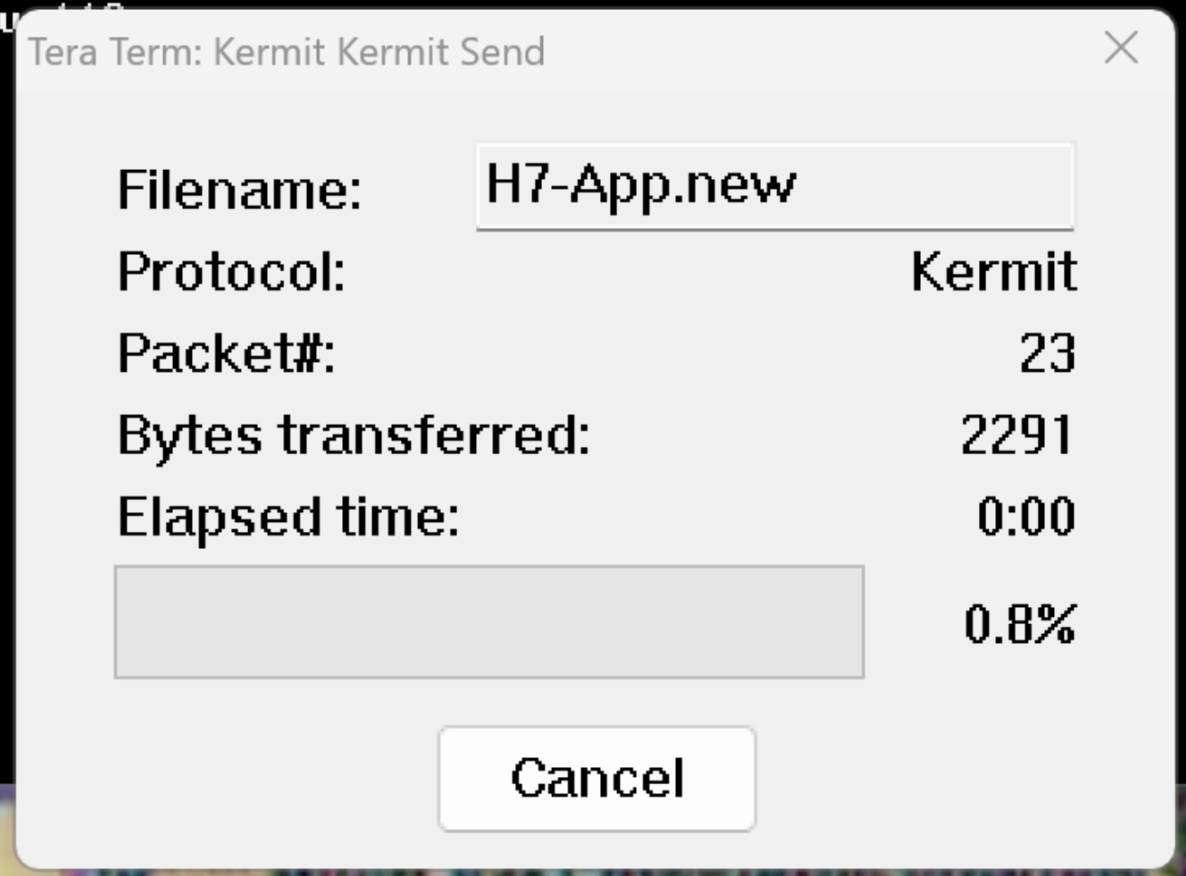
- Progress bar will reach 100% and the dialogue will close.
- The RockREMOTE Mini or RockBLOCK Pro will automatically reboot on completion.
Serial port update using Linux
Linux
- Save Kermit script to "fw-update.kerm"
#!/usr/bin/kermit +
if < \v(argc) 4 {
    echo "Usage: \%0 <serial port> <baudrate> <*.new app file>"
    echo "eg. \%0 /dev/ttyUSB0 115200 H7-App.new"
    exit 1
}
assign SERIAL_PORT \%1
assign SERIAL_BAUD \%2
assign FILENAME \%3
# Set the communication parameters
set line \m(SERIAL_PORT)
set speed \m(SERIAL_BAUD)
set flow none
set parity none
set stop-bits 1
set carrier-watch off
set file names literal
set window-size 1
set receive packet-length 94
send /AS-NAME:H7-App.new /BINARY \m(FILENAME)
# Uncomment this for stats to be displayed at the end
# statistics /VERBOSE
close
exit
- Put the RockREMOTE Mini or RockBLOCK Pro in "Kermit Receive" Mode:
Command:
AT+CTOK
Expected response:
+CTOK: <token number>
OK
Note that the token number will only be valid for 30s
Command:
AT+CDFU=<insert token number>
Expected Response:
+CDFU: READY
- Run the script by:
./fw-update.kerm /dev/ttyUSB0 115200 /<filepath>/<Firmware File>
- Progress bar will reach 100% and the dialogue will close.
- The RockREMOTE Mini or RockBLOCK Pro will automatically reboot on completion.
Replace ttyUSB0 with your correct serial device name (run dmesg | grep tty to find)
Also replace baudrate and other parameters if required
Serial port update using Linux Mac OS X
Mac OS X
MacOS, including older versions of C-Kermit (v9) running on Linux require the following:
kermit -l /dev/tty.usbserial-FT4WLSEC -b 115200 -i -C "set carrier-watch off, set flow none, set parity none, set stop-bits 1, set file names literal, set window-size 1, set receive packet-length 94, send /AS-NAME:H7-App.new /BINARY H7-App-Test-0-0-0.new, close, exit"
Replace /dev/tty.usbserial-FT4WLSEC with your correct serial device name (run dmesg | grep tty to find)
Also replace baudrate and other parameters if required
Also replace H7-App-Test-0-0-0.new with the correct name of the file
Firmware and Config update Over the Air via Cloudloop Device Manager
Cloudloop Device Manager (CDM) allows remote management and troubleshooting of devices and uses Iridium Messaging Transport (IMT)
Any use of Cloudloop Device Manager will result in data usage
User Configuration update over IMT and CDM
User Configuration update over IMT and CDM
Optimising for lowest possible satellite data usage, the user configuration file is split by sections in CDM.
Each section can be individually requested, and updated.
Firmware update over IMT and CDM
Firmware update over IMT and CDM
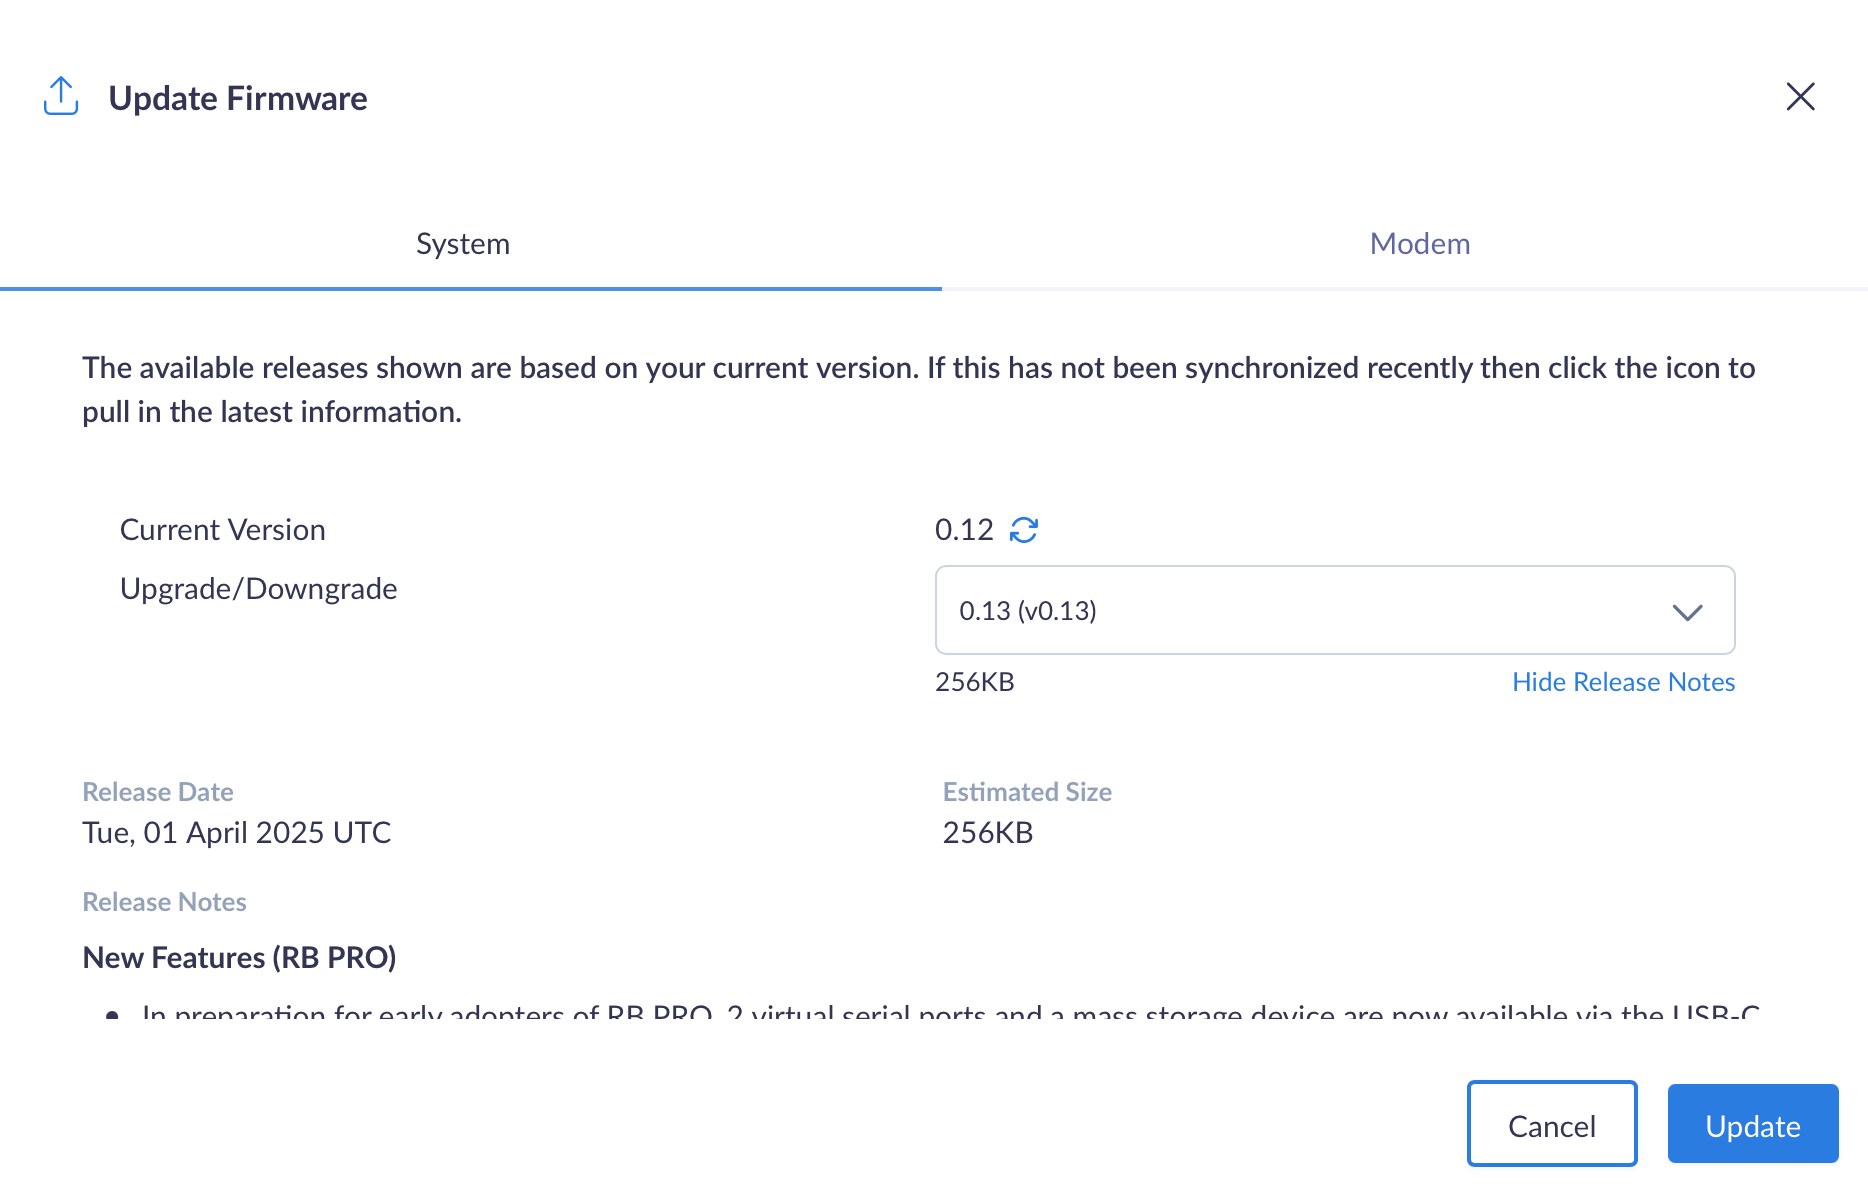
CDM allows the upgrade and downgrade of Firmware with the option to check the current version, see the release notes of new versions and the estimated size of the new version.
Note that from v0.17 each FW update is likely to also require an update to the Bootloader. The Bootloader MUST be downloaded to the unit BEFORE the FW update, therefore when the FW update is requested from CDM it will begin by transferring the Bootloader, this will trigger a re-boot once complete, after this re-boot the remaining files including the new FW will be transferred, resulting in a final re-boot when all files will be installed simultaneously.
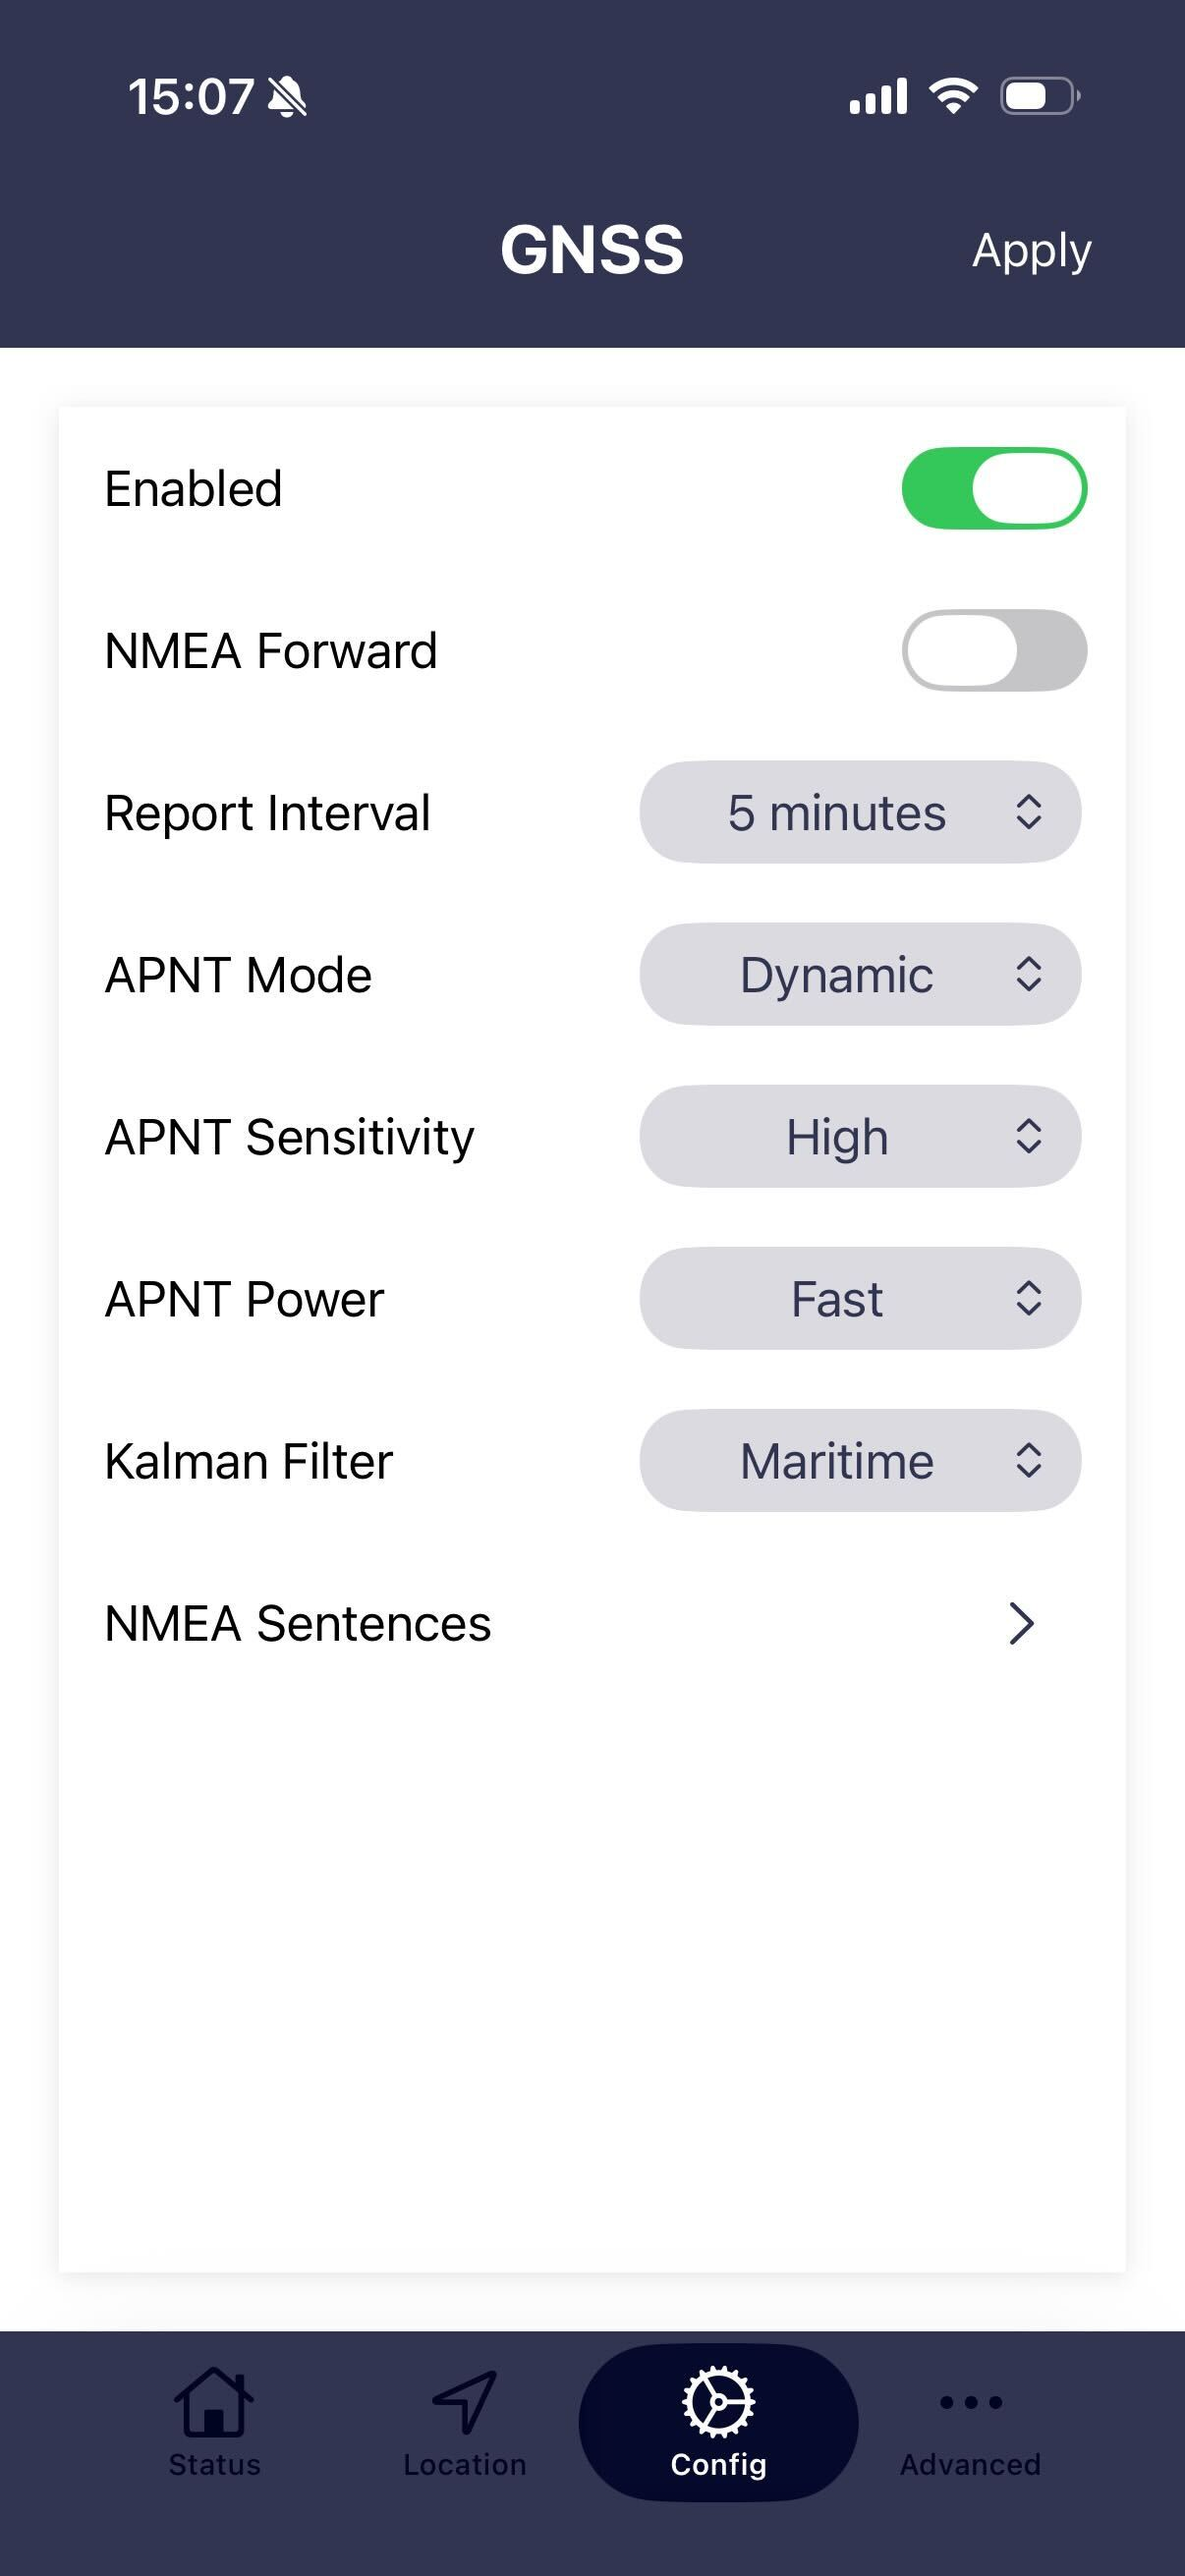
User Configuration via Bluetooth App
A subset of RockREMOTE Mini functionality can be configured and managed via the RockCONNECT IoT (From FW v0.15)