📣 Firmware Update Release:
Firmware Version v0.22 is now released! Please follow the link here or update via Cloudloop Device Manager.
Mini IP Interface
The Mini supports IP via the Iridium Certus 9770 module (WAN) allowing LAN device IP data to be be forwarded via the WAN interface.
The default LAN configuration on the Mini is 192.168.250.0/24 with the Mini having the static IPv4 of 192.168.250.1. The Mini does have a DHCP server on the LAN but disabled by default, therefore all LAN devices need to be configured with a static IPv4 of 192.168.250.2 to 192.168.250.99 and netmask of 255.255.255.0 the gateway should be configured to 192.168.250.1
LAN
The RockREMOTE Mini can have a number of Local Devices connected to its Local Area Network (LAN). For example:
- A single device plugged into the wired ethernet port
- Multiple devices plugged into a network switch, which is plugged into the wired ethernet port
Be careful not to choose a subnet that overlaps with the WAN interfaces. Some subnets will be rejected because they are used internally. For example the Iridium WAN interfaces uses 192.168.2.0/24 internally, which means the LAN IP range of 192.168.2.0/24 can not bet used.
The RockREMOTE Mini has outbound firewall rules open by default. Connecting it to a Laptop with a default gateway will result in IP data use.
Further details and instructions for configuration of the RockREMOTE Mini's IP address and DHCP server (etc) can be found here: User configuration
Confirm the IP connection with ICMP Pings
- Connect the Certus antenna to the Mini.
- Power up the Mini.
- Configure a LAN device IPv4 configuration to the settings below. Preferable the LAN device should be a test PC so it has access to IP utilities like
ping.- IPv4 Address:
192.168.250.2to192.168.250.99 - IPv4 Netmask:
255.255.255.0 - IPv4 Gateway:
192.168.250.1
- IPv4 Address:
- If possible isolate traffic on the LAN device to prevent unwanted IP forwarding.
- To confirm there is a LAN connection, ping Mini address from the LAN device, all pings should get a response. If this does not happen follow the steps above again, verifying the IPv4 configuration. An example command response is below.
root@test:~ $ ping 192.168.250.1
PING 192.168.250.1 (192.168.250.1) 56(84) bytes of data.
64 bytes from 192.168.250.1: icmp_seq=1 ttl=64 time=0.593 ms
64 bytes from 192.168.250.1: icmp_seq=2 ttl=64 time=0.526 ms
64 bytes from 192.168.250.1: icmp_seq=3 ttl=64 time=0.521 ms
64 bytes from 192.168.250.1: icmp_seq=4 ttl=64 time=0.514 ms

--- 192.168.250.1 ping statistics ---
4 packets transmitted, 4 received, 0% packet loss, time 3050ms
rtt min/avg/max/mdev = 0.514/0.538/0.593/0.031 ms
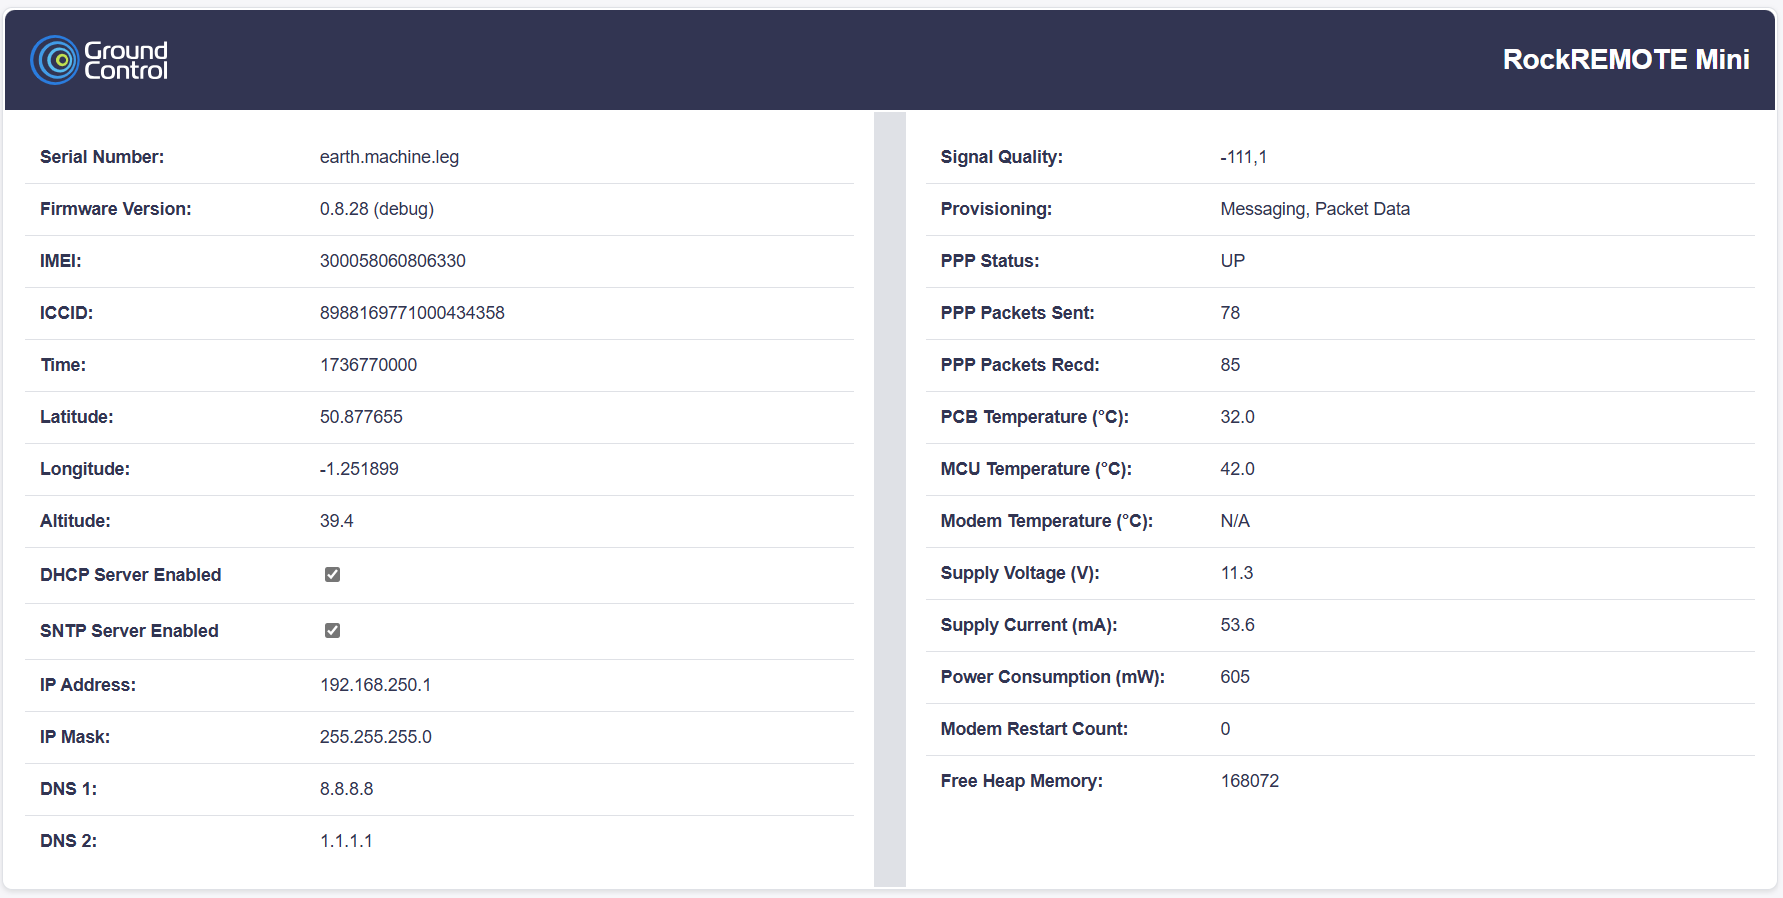
- To confirm the Mini's WAN connection you could open an internet browser and connect to http://192.168.250.1. The Mini Home page should load indicating its current state. To confirm the LAN is up by checking the
PPP Status. This should reportUPif connected. IfDOWNis reported confirm a antenna is connected and Mini is provisioned, if this is the case theSignal Qualitywill not be0,0andProvisioningwill reportMessaging,Packet Data
- If
PPP Statusis reported asUP, the Mini is ready for ICMP pings over the internet. Run a ping to a known server which has a static IPv4. Usually a ping to8.8.8.8(dns.google.com) is ideal. You may observe a few losses to begin-with as it takes some time Iridium Certus to ramp up the radios for IP transmission, once the pings start getting responses the ping response time will decrease down to about 400 - 600 ms. An example of of this is below.
root@test:~ $ ping 8.8.8.8
PING 8.8.8.8 (8.8.8.8) 56(84) bytes of data.
64 bytes from 8.8.8.8: icmp_seq=1 ttl=112 time=8630 ms
64 bytes from 8.8.8.8: icmp_seq=2 ttl=112 time=7699 ms
64 bytes from 8.8.8.8: icmp_seq=3 ttl=112 time=6855 ms
64 bytes from 8.8.8.8: icmp_seq=4 ttl=112 time=5921 ms
64 bytes from 8.8.8.8: icmp_seq=5 ttl=112 time=4987 ms
64 bytes from 8.8.8.8: icmp_seq=6 ttl=112 time=4053 ms
64 bytes from 8.8.8.8: icmp_seq=7 ttl=112 time=3119 ms
64 bytes from 8.8.8.8: icmp_seq=8 ttl=112 time=2185 ms
64 bytes from 8.8.8.8: icmp_seq=9 ttl=112 time=1251 ms
64 bytes from 8.8.8.8: icmp_seq=10 ttl=112 time=612 ms
64 bytes from 8.8.8.8: icmp_seq=11 ttl=112 time=601 ms
64 bytes from 8.8.8.8: icmp_seq=12 ttl=112 time=591 ms
64 bytes from 8.8.8.8: icmp_seq=13 ttl=112 time=491 ms
64 bytes from 8.8.8.8: icmp_seq=14 ttl=112 time=480 ms
64 bytes from 8.8.8.8: icmp_seq=15 ttl=112 time=559 ms
64 bytes from 8.8.8.8: icmp_seq=16 ttl=112 time=459 ms
64 bytes from 8.8.8.8: icmp_seq=17 ttl=112 time=448 ms
64 bytes from 8.8.8.8: icmp_seq=18 ttl=112 time=437 ms
64 bytes from 8.8.8.8: icmp_seq=19 ttl=112 time=606 ms
64 bytes from 8.8.8.8: icmp_seq=20 ttl=112 time=595 ms

--- 8.8.8.8 ping statistics ---
20 packets transmitted, 20 received, 0% packet loss, time 19194ms
rtt min/avg/max/mdev = 437.244/2529.122/8630.026/2724.318 ms, pipe 9
If your LAN device has more than one network interfaces, on Windows you can use ping -S 192.168.250.2 8.8.8.8 and on
Linux you can use ping -I eth1 8.8.8.8. Where 192.168.250.2 and eth1 are the IP or interface configured on the RockREMOTE Mini's
network subnet, and 8.8.8.8 is the Destination IP.
Testing TCP and UDP Connections with Netcat
Prerequisites
- Perform the ICMP ping test as explained above to verify the Iridium Certus connection is up.
- Ensure netcat (or nc) is installed on both the client (test PC) and the server.
- For Linux/Mac, install via package manager if not already installed.
- Ubuntu/Debian: sudo apt-get install netcat
- CentOS/RHEL: sudo yum install nc
- Mac: brew install netcat
- For Windows, download netcat nmap and add it to the system PATH.
- For Linux/Mac, install via package manager if not already installed.
Testing TCP Connection
On the Server
- Open a terminal on the server.
- Start a netcat listener on the desired port (e.g., port 12345):
nc -vl -p 12345
On the Client (Test PC)
- Open a terminal or command prompt.
- Connect to the server’s IP address on the specified port:
nc -v <server-ip> 12345
- Type a message and press Enter. If the connection is successful, you should see the message appear on the server’s terminal.
Testing UDP Connection
On the Server
- Open a terminal on the server.
- Start a netcat listener on the desired port (e.g., port 12345):
nc -vul -p 12345
On the Client (Test PC)
- Open a terminal or command prompt.
- Connect to the server’s IP address on the specified port:
nc -vu <server-ip> 12345
- Type a message and press Enter. If the connection is successful, you should see the message appear on the server’s terminal.
Troubleshooting
- Ensure
ProvisioningisMessaging, Packet Data. - Ensure
PPP StatusisUP. - Ensure the server’s firewall is configured to allow traffic on the specified port.
- Ensure the client's firewall is configured to allow outbound traffic.
The RockREMOTE Mini can act both as a client and as a server.
Please look at the User Configuration file
- Verify the server’s IP address and port number.
- Ensure there are no network issues by performing the ICMP ping test first.
SMTP
Resource moved under Operation, click here to get redirected