Map Options
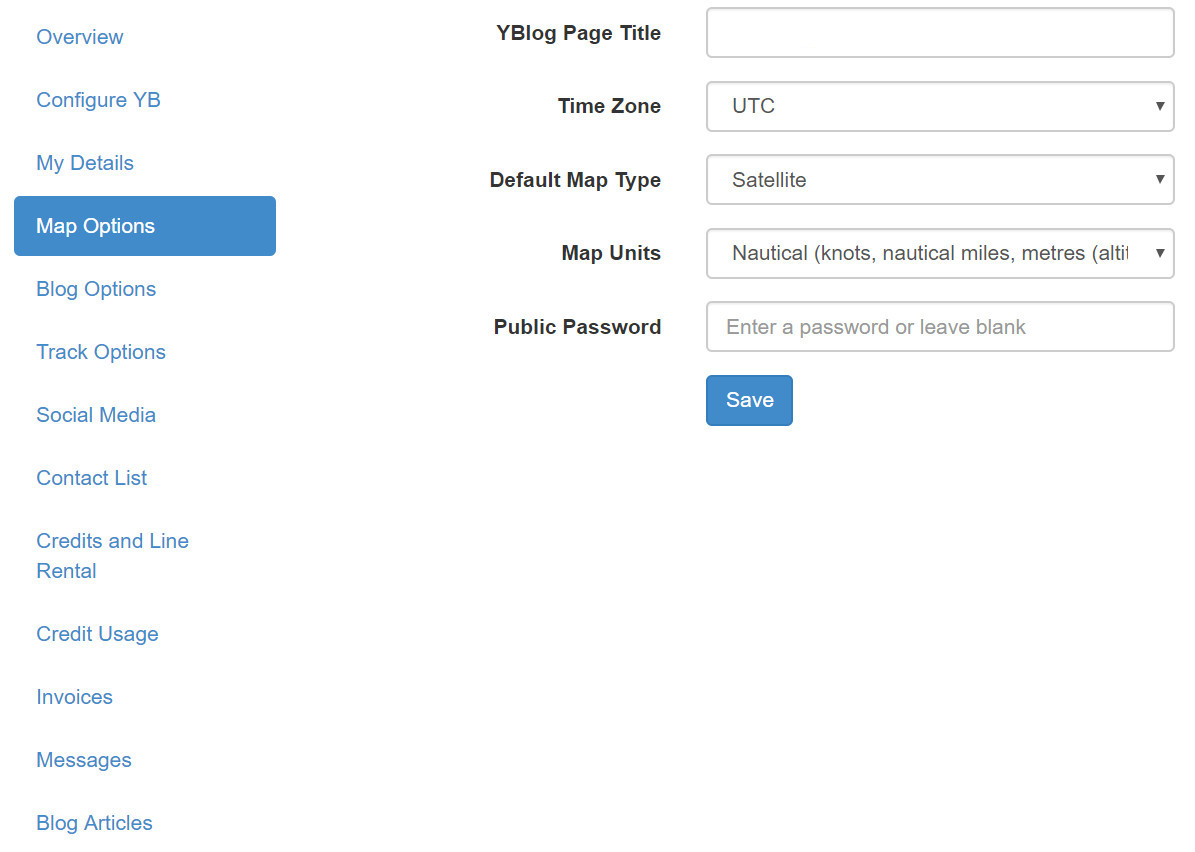
In the Map Options window the following information is displayed:

YBlog Page Title
Sets the page title that is located right next to the YB Logo on your YBlog. This will not change the URL of the web page - only the title of the YBlog in the top bar.
Time Zone
Though Iridium time is always measured in UTC, the transmission time shown on the YBlog, either on a position report or blog post, will be converted to the time zone your YBlog is set to e.g. UTC +1.
Our system also takes into account Daylight Savings Time in all countries that apply it. When the clocks are adjusted forward or backward, the YBlog will automatically adjust to the local time.
Default Map Type
This option will set the type of map displayed on the YBlog home page. You can choose from a Satellite, Road Map, or Terrain map.
Map Units
Three types of unit measurements are available:
- Nautical (knots, nautical miles, meters (altitude))
- Metric (km/h, kilometres, meters (altitude))
- Statute (mph, miles, feet (altitude))
Public Password
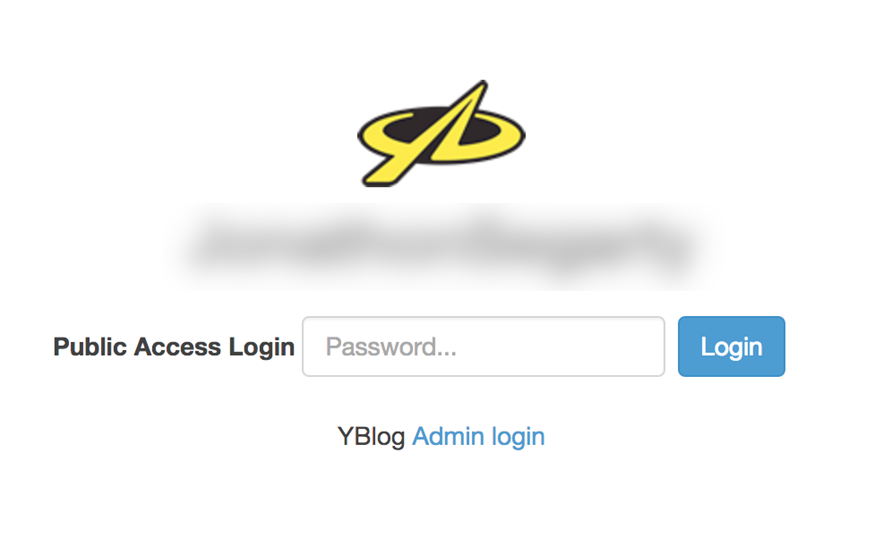
You can password protect your YBlog to restrict access. When password protected, the home screen will display nothing but a log-in box as shown below.

If a password has been set but you no longer wish to have your YBlog password protected, you can check the Reset Public Password option and click save. This will remove the password and make your YBlog public again.
To log in to the admin area, click the Admin Login link underneath the password field and use your usual YBlog Username and Password.
Embedding Your YBlog in Another Website
To display your YBlog on your own website, you can use the following iframe code. This code allows your YBlog to appear as part of your web page, so viewers can see your latest updates and tracking information.
Step 1: Copy the iframe Code
<iframe src="https://my.yb.tl/<username>" width="900" height="600" marginwidth="0" marginheight="0" frameborder="no" scrolling="yes" style="border-style: solid; border-color: #CCCCCC; border-width: 1px; background: #FFFFF;"></iframe>
Step 2: Replace <username>
- Replace
<username>in the code with your YBlog username. - Example: If your YBlog username is
johnsailing, replace<username>withjohnsailinglike this:
<iframe src="https://my.yb.tl/johnsailing" width="900" height="600" marginwidth="0" marginheight="0" frameborder="no" scrolling="yes" style="border-style: solid; border-color: #CCCCCC; border-width: 1px; background: #FFFFF;"></iframe>
Step 3: Customise Dimensions (Optional)
- Width and Height: Change the values for
widthandheightto adjust the iframe size to fit your website layout. For example: width="800" height="500" - Border and Background: You can customise the
border-style,border-color, andbackgroundto better match your website’s design. Adjust as needed for a cohesive look.
Once you’ve updated the iframe code with your YBlog username and any customisations, paste it into the HTML of your website where you’d like your YBlog to appear.
Some website platforms may limit iframe usage or have specific instructions for adding code. Check with your website provider if you’re unsure where to paste the iframe code.